Meta launched Facebook Reels in February 2022 as a follow-up to Instagram Reels and as a competitor to TikTok, whose short-form videos changed the social media landscape. If you’re active on Instagram, you likely know how to create an Instagram Reel, but you may not know how to post Reels on Facebook.
If you’re unsure how to create and post Reels on Facebook, keep reading for a step-by-step guide and information on Facebook Reels’ best practices.
Download Now: The State of Social Media Trends [Free Report]
How to Create Facebook Reels
Creating a Facebook Reel is very simple. Here’s what you need to do:
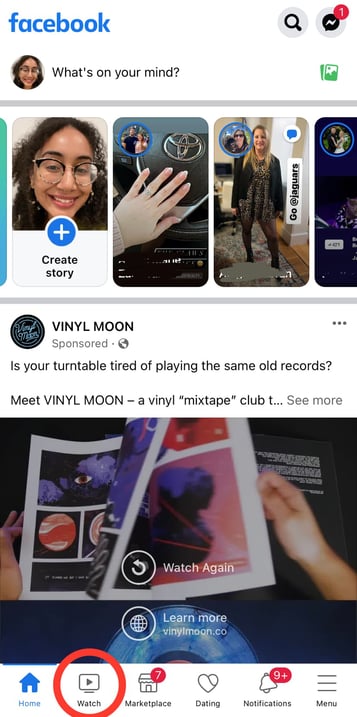
1. Launch the Facebook app.
2. Access the Reels feature on the app by clicking the Watch icon near the bottom left corner of your screen.
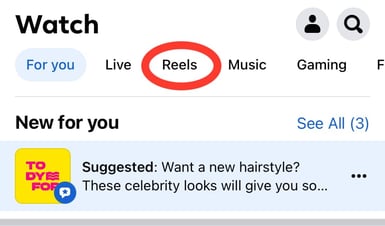
3. Tap the Reels tab on the Watch page.
4. Click the camera icon in the top right corner of the Reel to create your own.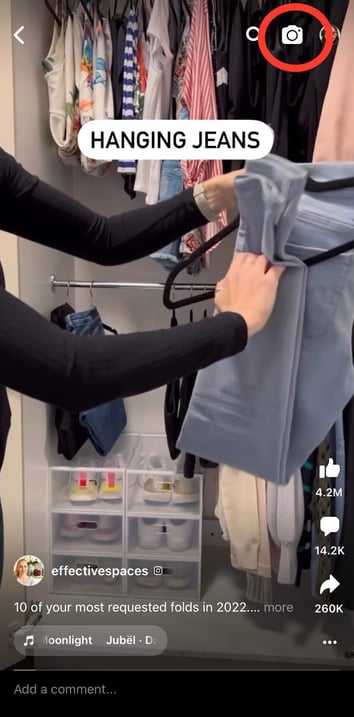
5. To start creating your Reel by adding video or filming within the app, tap Camera. Suppose you want to start by adding music; tap Music. And if you’re going to start with a green screen, tap Green Screen to superimpose yourself onto a background or to import your images as a background.
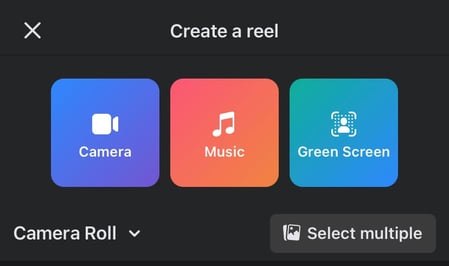
Once you’ve selected the content you want, you can start editing your Reel together. Read on for more information about Facebook Reels’ editing features.
How to Edit in Facebook Reels
If you’re filming directly in the app, you’ll notice the following features to edit your video to your liking:
- Audio
- Speed
- Effects
- Timer
- Green screen
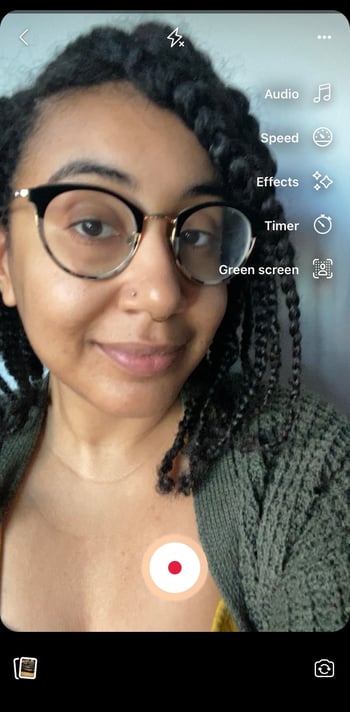
Audio allows you to select the music you want as the soundtrack to your Reel. Speed can be used to speed up or slow down your video. The Effects feature adds a filter or other visual effects, such as sparkles, to your video.
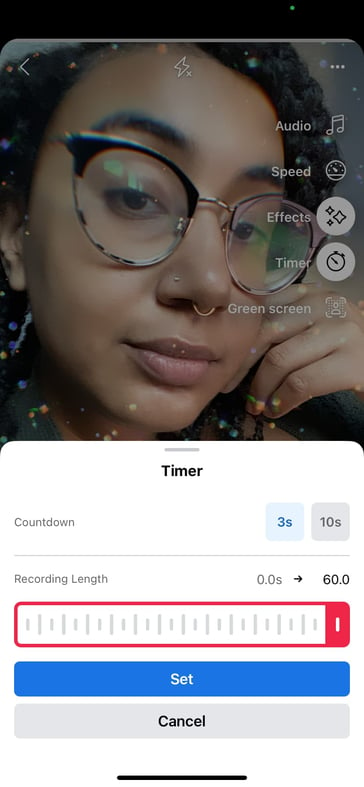
The Timer feature allows you to set a 3-second or 10-second countdown for when you want to start recording, and you can set your duration for up to 60 seconds. And Green Screen adds a background to your video.
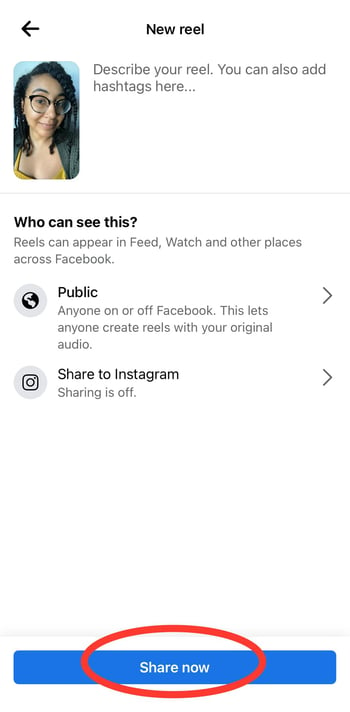
Once you’re happy with your settings, you can hit record to create your Reel. When you’re done recording, hit next, add a caption, and tap Share Now to post your Reel.
 If you’re using pre-recorded videos from your phone to create your Reel, you’ll notice the same Audio and Effects features along with Text, Trim, Captions, and Stickers.
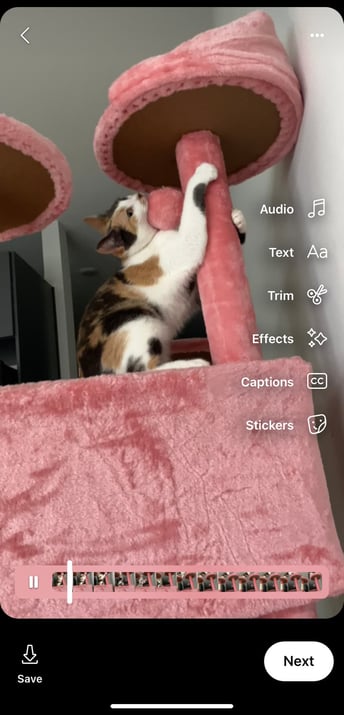
With Text, you can add text to your video. Trim allows you to shorten your imported video. The Captions feature adds closed captioning to your Reel, and the Stickers feature adds icons and small images on top of your video. Once satisfied, just hit next, add a caption, then tap Share Now to post.
Facebook Reels Best Practices
To boost the chances of your Reel getting discovered, follow these best practices:
- Create relatable and engaging content that captures your audience’s attention.
- Start a trend that other users can easily participate in.
- Always use vertical videos and avoid using horizontal videos.
- Add music from Facebook’s music library, other Reels, or your music that you create.
Your content also needs to be of excellent quality, which means avoid posting Reels that are:
- Blurry due to poor resolution
- Recycled from other apps and contain watermarks
- Uploaded with a border around the video
- Filmed horizontally
Now you know how to create, edit, and upload your first Facebook Reel. And with the best practices we’ve shared, you now have everything you need to make your Reel a hit.